Usage
Make sure to read the Getting Started section if you haven’t done so yet.
Writing To Display
Regular text can be written to the CharLCD instance using
the write_string() method. It accepts unicode strings
(str in Python 3, unicode in Python 2).
The cursor position can be set by assigning a (row, col) tuple to
cursor_pos. It can be reset to the starting position
with home().
Line feed characters (\n) move down one line and carriage returns (\r)
move to the beginning of the current line.
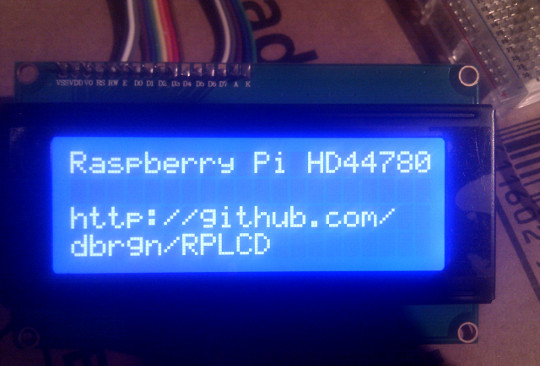
lcd.write_string('Raspberry Pi HD44780')
lcd.cursor_pos = (2, 0)
lcd.write_string('https://github.com/\n\rdbrgn/RPLCD')
You can also use the convenience functions cr(), lf() and crlf() to
write line feed (\n) or carriage return (\r) characters to the display.
lcd.write_string('Hello')
lcd.crlf()
lcd.write_string('world!')
After your script has finished, you may want to close the connection and
optionally clear the screen with the close() method.
lcd.close(clear=True)
When using a GPIO based LCD, this will reset the GPIO configuration. Note that doing this without clearing can lead to undesired effects on the LCD, because the GPIO pins are floating (not configured as input or output anymore).
Clearing the Display
You can clear the display by using the clear() method. It
will overwrite the data with blank characters and reset the cursor position.
Alternatively, if you want to hide all characters but keep the data in the LCD
memory, set the display_enabled property to False.
Character Maps
RPLCD supports the two most commonly used character maps for HD44780 style displays: A00 and A02. You can find them on pages 17 and 18 of the datasheet.
Additionally it supports the character map 0B of the ST7066 controller chip.
The default character map is A02. If you find that some of the characters
you are writing to the display turn out wrong, then try using the A00
character map:
lcd = CharLCD(..., charmap='A00')
As a rule of thumb, if your display can show Japanese characters, it uses
A00, otherwise A02 or ST0B. To show the entire character map on your LCD, you
can use the show_charmap target of the rplcd-tests script.
Should you run into the situation that your character map does not seem to match
either the A00 or the A02 tables, please open an issue on Github.
The same thing counts if you have a character that should be supported by your character map, but which doesn’t get written correctly to the display. Let me know by opening an issue!
In case you need a character that is not included in the default device character map, there is a possibility to create custom characters and write them into the HD44780 CGRAM. For more information, see the Creating Custom Characters section.
Creating Custom Characters
The HD44780 supports up to 8 user created characters. A character is defined by a 8x5 bitmap. The bitmap should be a tuple of 8 numbers, each representing a 5 pixel row. Each character is written to a specific location in CGRAM (numbers 0-7).
>>> lcd = CharLCD(...)
>>> smiley = (
...     0b00000,
...     0b01010,
...     0b01010,
...     0b00000,
...     0b10001,
...     0b10001,
...     0b01110,
...     0b00000,
... )
>>> lcd.create_char(0, smiley)
To actually show a stored character on the display, you can use hex escape codes with the location number you specified previously. For example, to write the character at location 3:
>>> lcd.write_string('\x03')
The escape code can also be embedded in a longer string:
>>> lcd.write_string('Hello there \x03')
The following tool can help you to create your custom characters: https://omerk.github.io/lcdchargen/
Changing the Cursor Appearance
The cursor appearance can be changed by setting the
cursor_mode property to one of the following three
values:
hide– No cursor will be displayedline– The cursor will be indicated with an underlineblink– The cursor will be indicated with a blinking square
Backlight Control
I²C
If you’re using an LCD connected through the I²C bus, you can directly turn on
the backlight using the boolean backlight_enabled property.
GPIO
By setting the pin_backlight parameter in the CharLCD
constructor, you can control a backlight circuit.
First of all, you need to build an external circuit to control the backlight,
most LCD modules don’t support it directly. You could do this for example by
using a transistor and a pull-up resistor. Then connect the transistor to a GPIO
pin and configure that pin using the pin_backlight parameter in the
constructor. If you use an active high circuit instead of active low, you can
change that behavior by setting the backlight_mode to either
active_high or active_low. Now you can toggle the
backlight_enabled property to turn the backlight on
and off.
pigpio
When using the pigpio library, it is also possible to control the backlight
with PWM.
The API is compatible to the backlight control of I²C and GPIO explained above,
but the backlight_enabled property (and parameter)
now also accepts a value between 0 and 1 as a backlight level (0 or
False turns the backlight off, 1 or True turns it on). The perceived
brightness of the backlight should roughly correspond to the given value.
The PWM dimming of the backlight has to be enabled explicitly by setting the
backlight_pwm parameter to True during initialization of
CharLCD. If this parameter is False (the default
value), the interface only switches the backlight on and off. If this parameter
is a number, dimming of the backlight is enabled and the value is interpreted
as the PWM frequency in Hertz.
Contrast Control
This is currently only possible with the pigpio backend.
pigpio
The API is similar to that controlling the backlight. The pin_contrast
specifies the pin connected to the LCDs contrast input. The contrast_mode
can be active_high or active_low and the contrast_pwm sets the PWM
frequency.
The contrast property sets the contrast level. It
should be a value between 0 and 1. It is also recognized as a parameter
to CharLCD to set the initial contrast level.
If you don’t set the pin_contrast parameter, the contrast control stays
disabled.
Automatic Line Breaks
By default, RPLCD tries to automatically insert line breaks where appropriate to achieve (hopefully) intuitive line wrapping.
Part of these rules is that manual linebreaks (either \r\n or \n\r) that
immediately follow an automatically issued line break are ignored.
If you want more control over line breaks, you can disable the automatic system
by setting the auto_linebreaks parameter of the CharLCD constructor to
False.
lcd = CharLCD(..., auto_linebreaks=False)
Scrolling Text
I wrote a blogpost on how to implement scrolling text: https://blog.dbrgn.ch/2014/4/20/scrolling-text-with-rplcd/
To see the result, go to https://www.youtube.com/watch?v=49RkQeiVTGU.